Godot 4 2D Sprite Animations
What you'll learn
In this tutorial, we’ll walk through the process of creating 2D sprite animations in Godot 4, a powerful open-source game engine. Whether you’re using individual images or a sprite sheet, this guide will help you bring your characters to life.
- Importing sprites into Godot 4
- Using Godot's
AnimatedSprite2Dnode - Generating an animation from Individual images
- Generating an animation from sprite sheets
- Controlling animation speed and other metrics
- Previewing animations in the editor
- Writing animation code in GDScript
Step 1: Prepare Your Sprites
Your animation frames can be:
- Separate PNG images
- A single sprite sheet
We'll cover both. Just make sure all frames share the same dimensions. If you need example frames for the project, you can download the ones I use in my example here.
Step 2: Project Setup
Open up your Godot editor. Make sure you're using Godot 4.0 or higher.
- Create a new project
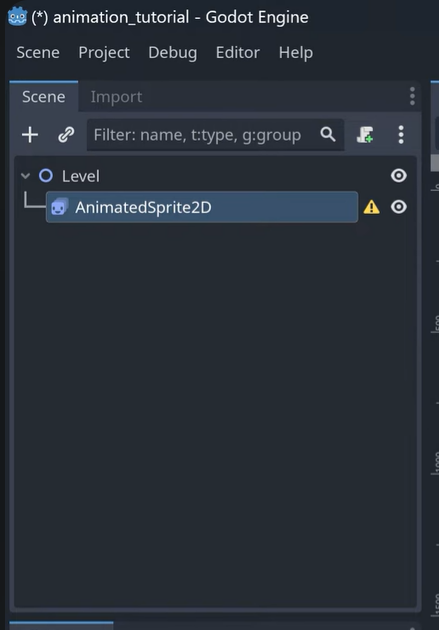
- Create a new scene with a basic 2D node as the parent node. (named "Level" in the img)
- Add a child node of type AnimatedSprite2D. Your project's scene tree should look like the following image:
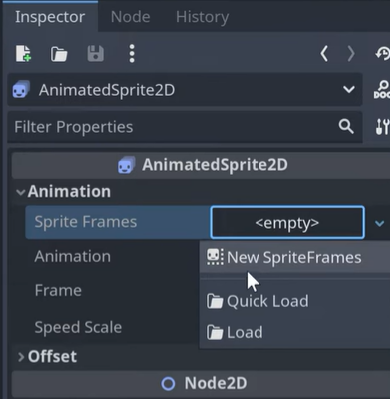
- Double click the new Animated Sprite 2d. This will open it up in the inspector window on the far right side of the project. Inside of this window, under the Animation tab, click on the empty box for Sprite Frames and select the option New Sprite Frames.
Step 3: Animate the sprite
3a: Separate images
-
Drag your frames into the animation timeline
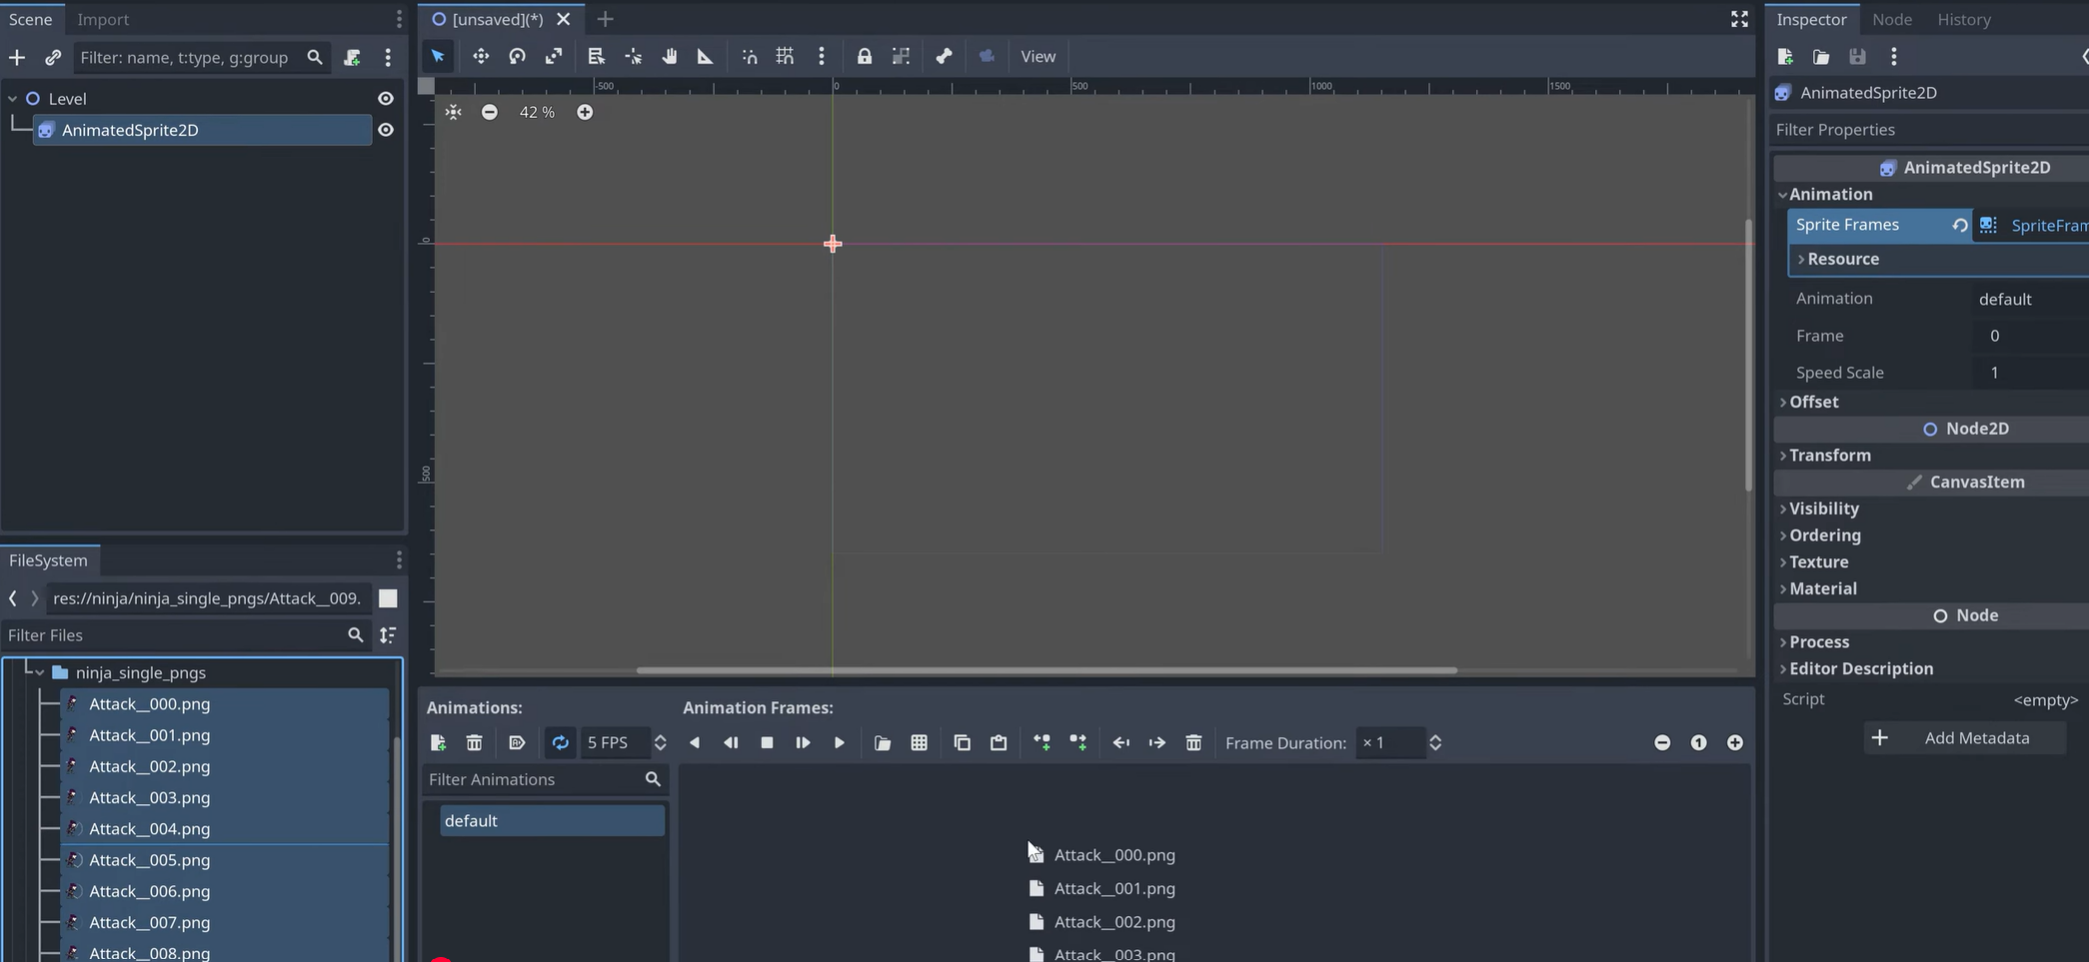
-
Adjust FPS to control animation speed

3b: Sprite Sheets
Godot allows you to slice sprite sheets directly:
- Choose Add frames from sprite sheet
- Set horizontal & vertical frame counts
- Preview animation instantly
Modifying Animation Values
There are a plethora of ways to modify your animation right inside the editor.
FPS
FPS (Frames Per Second): Frames per second, or FPS, is a measure of how many individual images, or frames, are displayed in one second of animation. Higher FPS generally results in smoother motion, while lower FPS can give animation a choppier, more stylized look. For example, movies typically run at 24 FPS, making movement appear fluid to the human eye. In character animations like walk cycles, you don’t always need a high frame rate. For this specific animation, 8–12 FPS works well, as it balances smoothness with a traditional, slightly “snappy” feel. Using fewer frames also makes the animation easier to manage and edit, especially for hand-drawn or pixel art styles, without losing the sense of motion.
Be sure to name all of your animations clearly (idle, run, jump, etc..). The animation name can be changed on the left side of the animation editor. You'll see the initial name for the animation is default
Looping
Step 4: Implement Animation code
Click on the 2D root node. This is the node I named Level. Then click the Add script button. You can leave the default name and setup. Just click Create to get started.
Inside of the editor, you'll see the following code
1extends Node2D23func _ready():4 pass56func _process(delta)7 pass
Template code explanation
_ready()
The _ready() function in Godot is called once when a node and all of its children have entered the scene tree and are fully initialized. It’s the perfect place to set up your game logic, initialize variables, connect signals, or start animations. Essentially, _ready() ensures that everything the node depends on is available before running any code, making it a reliable starting point for any scene-specific setup. If you have any code you want to run once at the time of load, this is where it would go.
_process(delta)
The _process(delta) function runs every frame and is used to handle continuous, frame-dependent logic, such as movement, input handling, or updating animations. The delta parameter represents the time elapsed since the previous frame, allowing you to make your calculations frame-rate independent. By multiplying motion or other updates by delta, you ensure smooth and consistent behavior regardless of whether the game is running at 30 FPS or 144 FPS.
pass
In GDScript, pass is a placeholder statement that does nothing. It quite literally just tells the engine, “do nothing here for now.” It’s useful when you want a empty function to exist. In GDScript, if you create a blank function, Godot will throw errors at runtime.
Adding AnimatedSprite2D code
Add your AnimatedSprite2D as a variable. This should be added on line 2, directly below extends Node2D. You can easily add it by clicking on the AnimatedSprite2D element in the Scene Tree and dragging it over to the code. It should add a new line of GDscript looks like @onready var animated_sprite_2d

Now that it's added, you can modify it directly inside of the code. First lets play the animation on lod. As mentioned, the _ready function is where we put code that we want to run once on load. So inside of _ready, replace the text pass with animated_sprite_2d.phay("attack")
I'm using the variable animated_sprite_2d , because that's the name of my variable on line 2. I'm also using the animation If yours is something different, replace it with that.
Your final block of code should look like:
1extends Node2D2@onready var animated_sprite_2d34func _ready():5 animated_sprite_2d.play("attack")67func _process(delta)8 pass
Now if you run the Node with F6 or entire project with F5 you should see your animation run.
Overview
Sprite animation is one of the most essential skills in 2D game development, as it brings characters, enemies, and environments to life. Learning to create smooth, expressive animations can completely transform the feel of a game, making it more engaging and immersive. Godot 4 makes this process approachable and powerful, even for beginners, thanks to its intuitive animation tools, flexible sprite handling, and user-friendly interface. Whether you’re animating a simple walk cycle or a complex multi-frame attack sequence, Godot gives you the control and efficiency you need to bring your ideas to life.
If you found this guide helpful, be sure to subscribe to my YouTube channel for more Godot tutorials, tips, and tricks that will help you level up your 2D game development skills!